Turtle vines have a reputation for being easy to care for. They’re incredibly hardy, can tolerate various lighting conditions, have low watering needs, and can adapt to different environments.
But while it might seem like turtle vines are all about “set it and forget it,” there’s a bit more to it if you want to see it in all its glory.
In this guide, we’ll discuss everything you need to know about growing turtle vines: from the soil, water, and light requirements to the ideal time to repot and prune the plant.
Turtle Vine General Information
Scientific Name: Callisia repens
Common Name: Turtle vine, creeping inchplant
Genus: Callisia
Plant Type: Perennial plant
Native Habitat: Central and South America
Preferred Environment: Warm and slightly humid
Growing Season: Spring and summer
Mature Size: 4 inches tall; 10 feet length
Toxicity: Toxic to humans and pets
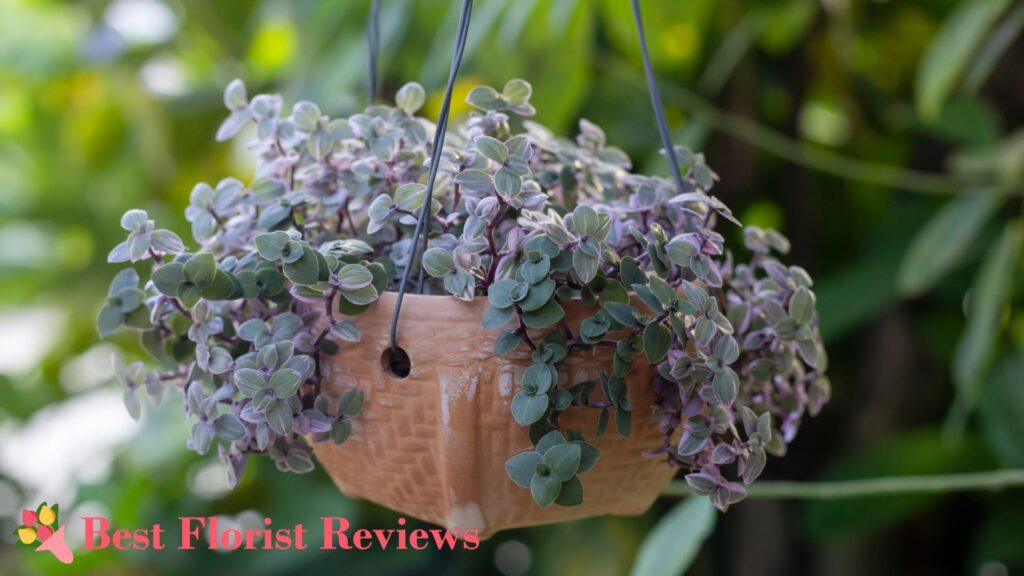
Callisia repens, commonly known as turtle vine and creeping inchplant, is a perennial succulent plant from the Callisia genus. It’s a popular indoor and outdoor plant choice because of its easy-to-care nature and beautiful appearance.
The plant is known for its creeping growth habit, making it suitable for hanging baskets. It’s also fast-growing and can usually reach 4 inches in height, while its stems can reach 10 feet in length.
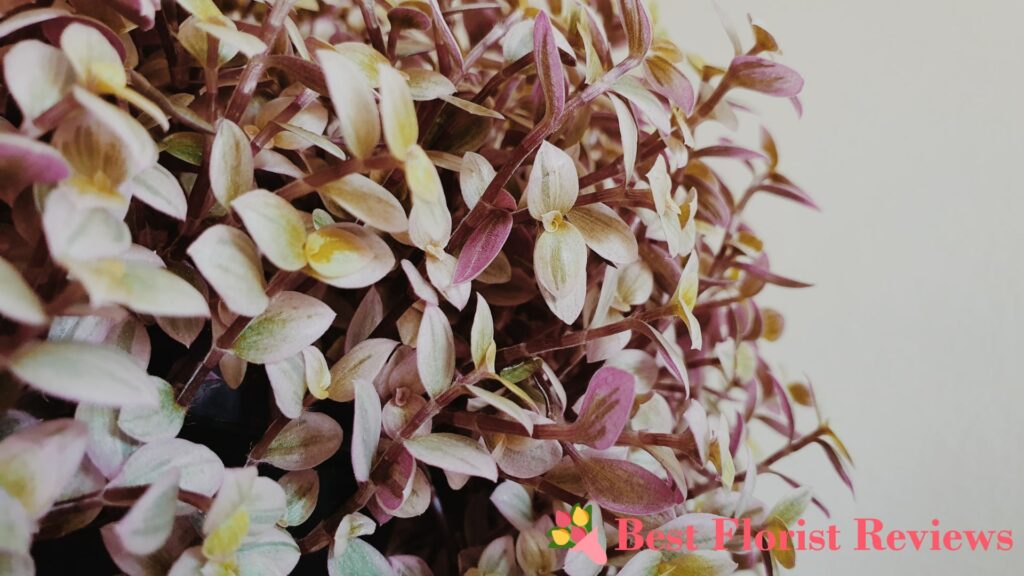
During spring, turtle vines typically produce clusters of small, white, or pinkish flowers. However, rather than the flowers, the plant’s most valued parts are its green, sometimes purple or pink, elongated leaves.
Taking Care of a Turtle Vine
What soil is best for turtle vine?
Turtle vines are not particular about their soil, but like most succulents, the best soil for them is sandy and well-draining. They also thrive in a slightly acidic mix, with a pH of 5.0 to 6.0.
The cactus and succulent soil mixes in the market are generally suitable for turtle vines. You can just buy one of them instead of making your own mix if you don’t have enough ingredients at home.
How do I make my own soil mix for turtle vine?
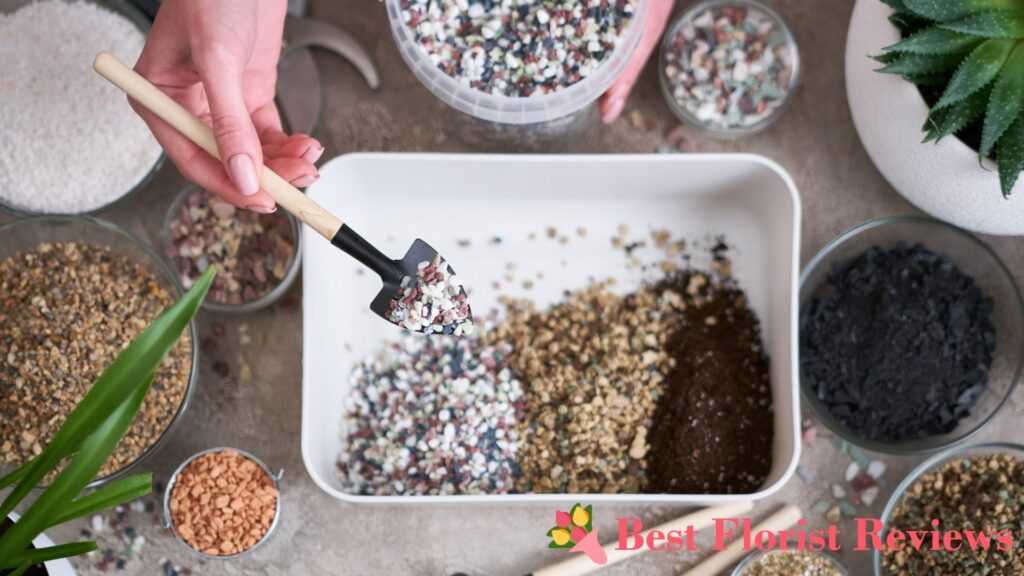
Since turtle vines love well-draining soils with a sandy texture, a mix of loam soil, perlite, sand, and peat moss is the best DIY potting mix you can make for the plant.
Place equal amounts of loam soil, perlite, coarse sand, and peat moss in a container. Mix it thoroughly.
Another recipe you can follow is 30% loam soil, 30% coco coir, 20% coarse sand, and 20% organic compost. This makes a nutrient-rich and well-draining potting mix.
How often should I water my turtle vine?
Turtle vines don’t like sitting in extremely moist soil. Water the plant only when the top two inches of the soil’s surface is completely dried out.
How often you water the plant will depend on the soil mix, the environment the plant is growing in, the light level it receives, and the plant’s size and stage of growth. When it’s time to water, add water until you see it draining out of the bottom of the pot.
In general, you might need to water your turtle vine every 1 to 2 weeks during spring and summer. However, your primary indicator should always be the soil’s moisture level instead of calendar days to help lessen the risk of overwatering and underwatering.
Do turtle vines require sun or shade?
Turtle vines should always be placed in locations where they can receive bright, indirect light. Although they can tolerate lower light conditions, they thrive best when they receive at least 6 hours of filtered sunlight daily.
If they’re grown outdoors, place them in areas with dappled sunlight or where they receive a lot of morning or late afternoon sun but are protected from the harsh midday sun.
Avoid exposing them to intense, direct sunlight, especially in tropical regions, as this can scorch their leaves and affect the plant’s overall health.
What temperature is recommended for turtle vines?
Turtle vines thrive in warm and moderate temperatures, which is typical of most indoor environments. They prefer temperatures between 60°F and 85°F.
They’re not cold hardy and can’t tolerate frost or freezing temperatures. The coldest temperature they can survive in is 41 °F but only for a short period.
If you’re growing them outdoors, be sure to bring them indoors during winter to protect them from the chilling weather. Don’t also place them near the window during winter, as this area is usually a lot colder than other parts of the house.
What humidity level is recommended for turtle vines?
Keeping the humidity level at around 40% to 60% is generally suitable for turtle vines. They thrive best when the humidity is at a moderate level, so most indoor environments are perfect for growing them.
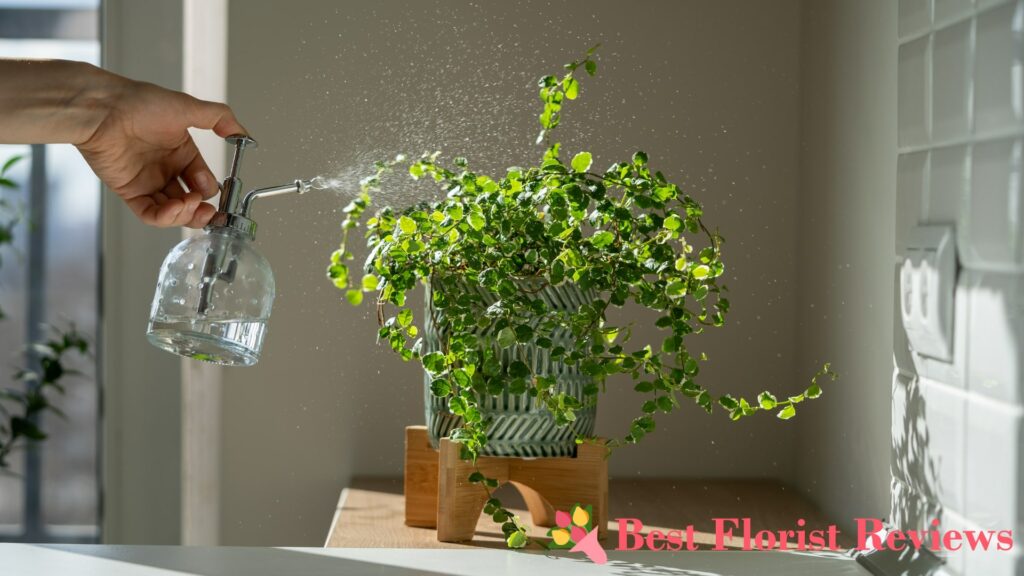
They can tolerate lower humidity levels but may require more attention to prevent excessive moisture loss. You will need to mist them occasionally and water them more frequently to help them survive dry growing conditions.
Avoid excessive humidity, as this can promote fungal issues and cause the turtle vine’s roots to rot.
How often should I fertilize my turtle vine?
Turtle vines don’t require frequent or heavy feeding. Fertilizing them every 4 to 6 weeks in late spring to late summer should be enough to keep the plant thriving.
You can use either vermicompost, a balanced, water-soluble fertilizer, or a liquid fertilizer specially made for succulents to provide the nutrients the plant needs.
Water the plant thoroughly before applying the fertilizer to prevent any potential damage that the plant may suffer from the fertilizer. Even when using fertilizers labeled “Ready to Apply,” it’s safer to water the soil first before application.
How often should I prune my turtle vine?
The pruning frequency of your turtle vine varies depending on your preference and the specific growth habit of the plant. Generally, you’d want to prune the plant whenever there are dead stems or it’s becoming excessively leggy.
It’s ideal to prune the plant during spring since it’s actively growing during this season. Pruning during this time allows the plant to recover and prevent it from becoming too straggly.
When pruning your turtle vine, be sure to use clean, sharp scissors to avoid damaging the plant. Additionally, don’t cut more than a third of the stem to prevent excessive stress.
When should I repot my turtle vine?
Turtle vines generally need to be repotted when you see roots circling inside the pot or emerging from the drainage holes. Typically, you’ll have to repot it every one to two years.
If your plant is also showing some signs of stress, like wilting and yellowing leaves, it might be best to repot it into fresh soil with improved drainage.
Repotting allows you to refresh the soil, provide more space for root growth, and maintain the turtle vine’s overall health.
How to Repot My Turtle Vine
Step 1: Choose a slightly larger pot
Select a pot about one to two sizes bigger than the old one. Make sure that the pot has at least three drainage holes for better draining.
Step 2: Prepare the potting mix
You can either use commercial potting mixes or follow our recipes above to make a DIY soil mix. Just make sure that the potting mix is well-draining and not contaminated by pests.
Step 3: Gently remove the plant from the old pot
Carefully remove the turtle vine from its current pot. Make sure not to cause damage to the roots and to shake off any of the excess soil.
Step 4: Repot the plant on the new pot
Insert the plant in the center of the new pot and add fresh potting mix around it. Fill the pot until it reaches an inch below the rim.
Firmly but gently press the soil around the plant to secure it.
Step 5: Water the plant thoroughly
After repotting, water the plant thoroughly until you see water coming out of the drainage holes. This way of watering will help the soil and new plant to settle in the new pot.
Step 6: Give the turtle vine some time to recover
The turtle vine may suffer shock from repotting, so give it some time to adjust to its new home. During this period, do not expose the plant directly to the sun and slightly minimize watering.
How to Successfully Propagate a Turtle Vine
Propagating a turtle vine is relatively easy and can be done through various methods, including stem cuttings and seeds. However, there’s a higher chance of successfully propagating your turtle vine if you use stem cuttings over seeds.
How to Successfully Propagate a Turtle Vine from a Stem Cutting
Step 1: Take a stem cutting
Using a clean, sharp pair of scissors, snip off a stem that’s about 4 inches long with 4 to 5 leaves.
When taking a cutting, ensure that you’re taking one from a healthy and long stem to avoid stressing the plant.
Step 2: Prepare a small pot for the cutting
Fill a small pot or container with the potting mix you used for the parent plant. Make a small hole in the soil with your finger for the stem cutting.
Step 3: Plant the stem cutting
Place the end of the stem cutting into the hole and lightly press the soil around it to hold it in place.
Step 4: Water the plant
Once the stem cutting has been planted, water it thoroughly to help it settle into the soil. Check the soil occasionally to see if it’s dry and watering is needed.
Step 5: Keep the plant away from direct sunlight
Place the pot somewhere it can receive bright, indirect light. Exposing the stem cutting to direct sunlight might burn the soft developing roots.
How to Successfully Propagate a Turtle Vine from Seeds
Step 1: Fill a small container with potting mix
Use a shallow container or a small pot with drainage holes. Make sure that the potting mix you’ll use is well-draining to provide the seeds with an environment where they can successfully germinate.
Step 2: Sow the seeds on the potting mix
Sprinkle the turtle vine seeds evenly on the surface of the soil. After sprinkling them, gently press the seeds into the soil to ensure good seed-to-soil contact.
Step 3: Mist the soil
Mist the soil to help the seeds settle into the soil more. Don’t water them as much as you usually do with mature turtle vines since too much moisture can disturb the seeds.
Step 4: Place the pot in a warm location with a lot of sunlight
Ensure that the pot is in a room with 60°F to 85°F temperature and a lot of filtered sunlight for quicker germination.
Excessive heat can prevent the seeds from germinating, so make sure to keep the plant somewhere not subjected to direct sunlight.
Common Problems with Turtle Vine
Overwatering
One of the most common problems with turtle vines is overwatering. Their roots are quite shallow, so they’re susceptible to rot if the soil remains consistently moist.
Root rot makes the roots mushy and reduces the ability of the plant to absorb oxygen and nutrients.
If the soil is always soggy, there’s also a high chance that fungi will grow in the soil
How to Fix Overwatering
Ensure your turtle vine is planted in a pot with drainage holes and a well-draining potting mix. If the soil appears compacted, clumpy, or sticky, then it’s time to change it with a fresh potting mix.
It’s also important to check the soil’s moisture level before watering. Insert your finger into the soil, and if the first 2 to 3 inches are dry, then it’s time to water.
Over time, you’ll become more familiar with your turtle vine’s specific watering requirements. Pay attention to how it responds to watering and adjust accordingly.
Pests
Pests like mealybugs, spider mites, and aphids are among the most common pests you’ll find infesting your turtle vines.
Mealybugs and aphids both feed on the plant’s sap, causing damage to the leaves. Mealybugs often appear as fluffy white clusters on the leaves, while aphids leave a sticky residue called honeydew on the leaves.
Spider mites, on the other hand, will often create webbings or stipplings on the leaves, so they’re easy to identify.
How to Fix Pests
If you come across pests in your turtle vine, separate it from all your other plants to prevent the infestation from spreading. Remove any heavily infested leaves or stems to reduce the pest population.
For the remaining pests in the plant, you can use insecticidal soap or neem oil. Be sure to apply soap or oil everywhere the pests may be, including the undersides of the leaves where they often hide.
If the infestation is too severe, you may have to give up on the plant and start anew.
Discoloration on the Leaves
Leaf discoloration on turtle vines may occur due to different reasons, including nutrient deficiencies and environmental stress. The leaves can sometimes turn yellow, or you may notice brown spots forming.
Stress can occur when the plant is exposed to extreme temperature changes, low lighting, or low humidity. This could cause the plant to redirect its energy to recovery, resulting in lesser energy and nutrients on the leaves.
The lack of essential nutrients, such as nitrogen, iron, or magnesium, can also lead to yellowing or reddish-brown discoloration.
How to Fix Discoloration on the Leaves
If you find some discolored leaves, it would be wise to cut them off to encourage the plant to grow healthier leaves. Make sure to also move the plant to an area with a more stable environment to prevent it from experiencing further stress.
Don’t forget to use a balanced, water-soluble fertilizer or vermicompost when needed to prevent nutrient deficiencies.